Install on an AWS EC2 Instance
You can install Nuvolaris on a single EC2 Instance.
You need at least 4GB, 30GB disk space and 2 VCPU.
As a prerequisite, you need to get access to the AWS Console by registering to Amazon Web Services.
Once you got access to the console, use the following instructions to lauch a suitable virtual machine:
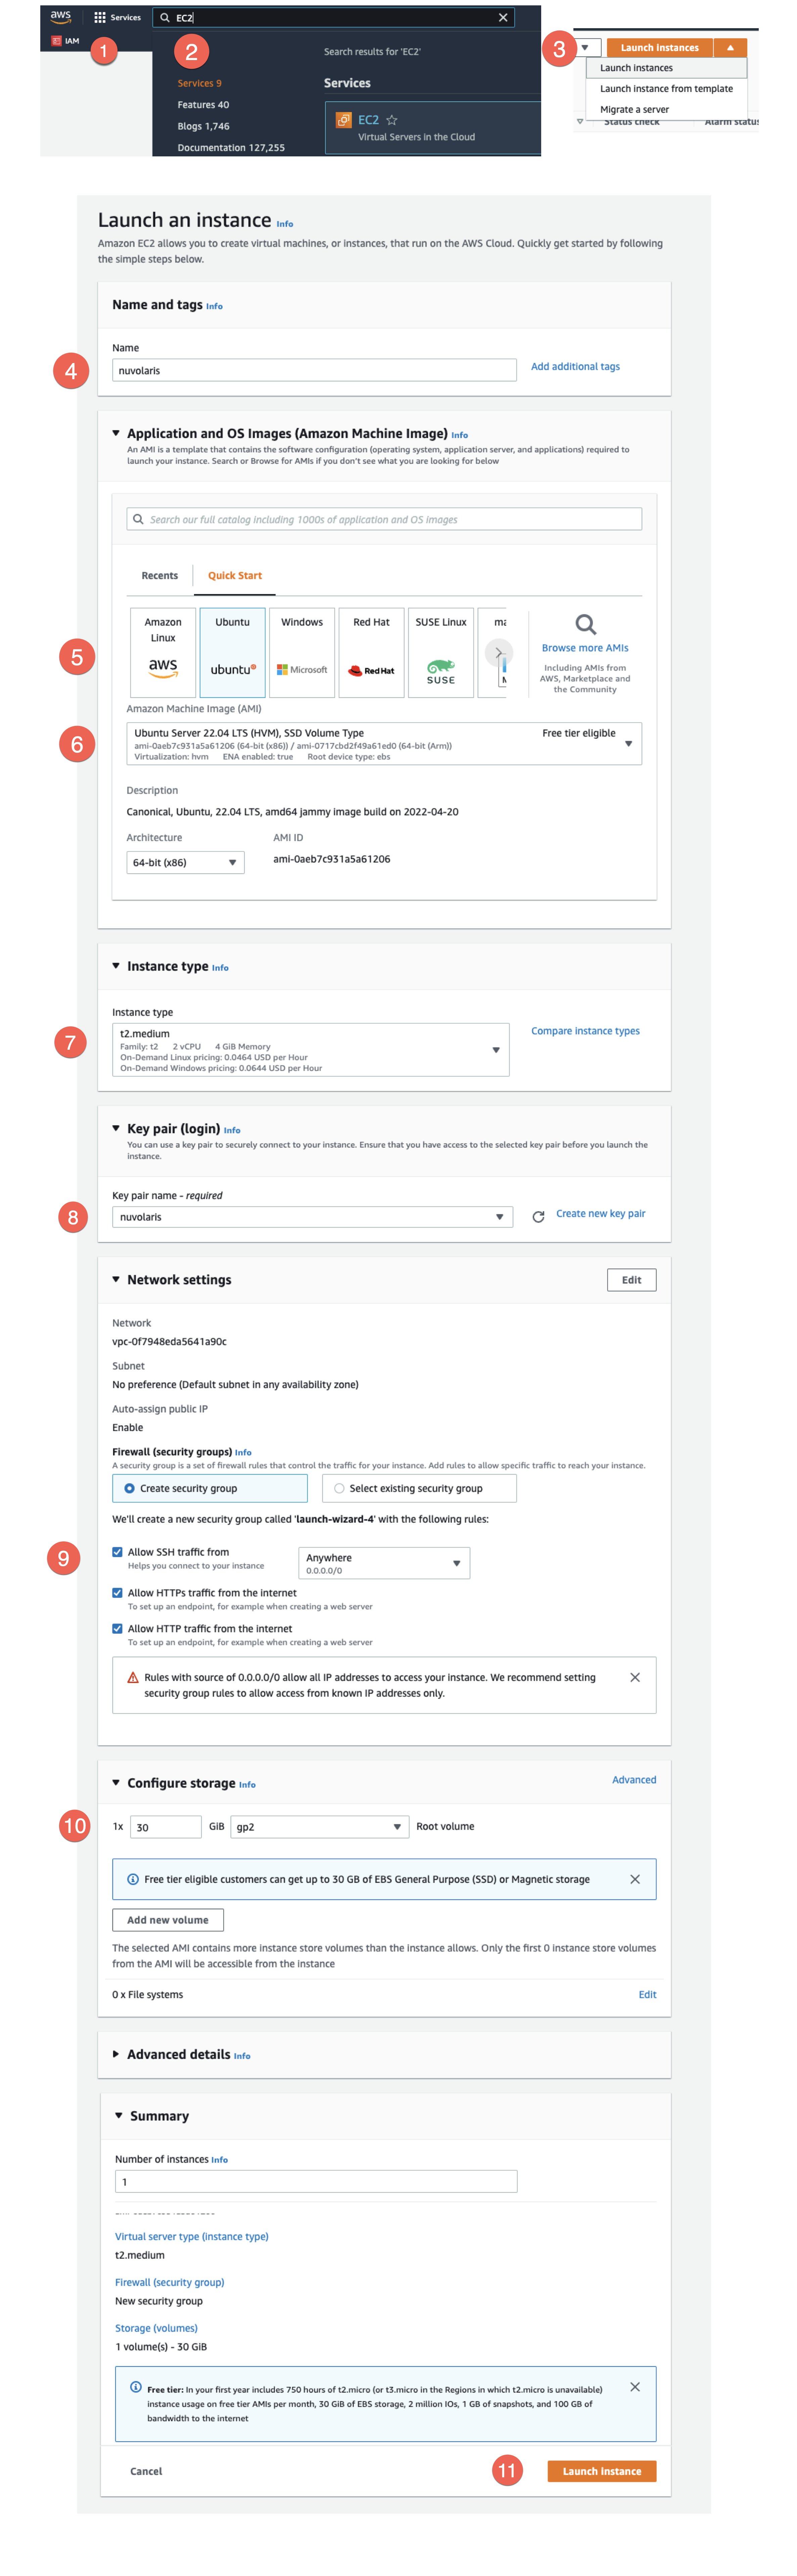
Launch the EC2 Virtual Machine
-
Click on the Services icon.
-
Type
EC2to find the EC2 service and click on the EC2 link. -
Find the
Launch Instancepull down, open it and click onLaunch Instances. Then fill the form that shows up as follows. -
Specify the name of the instance.
-
Select Ubuntu as the Image type to launch.
-
Select Ubuntu Server, at least 22.x or 20.x. We recommend you pick AMD64 as an architecture, for now.
-
Select an instance with at least 4GB of memory and 2VCPU. Suggested choice is
t2.medium. Larger VM types are ok, smaller are not. -
Specify the key pair you want to use. This step is required to be able to access the instance. If you do not have one, click on
Create new key pairand follow instructions to create a new key pair and download the key file. -
Here you need to allow traffic for SSH, HTTP and HTTPS.
-
Here you need at least 30Gb of disk space.
-
If you filled all the previous fields, you are ready and you can click here to Launch the instance.
Once the instance is up and running, the following screen will pop up:
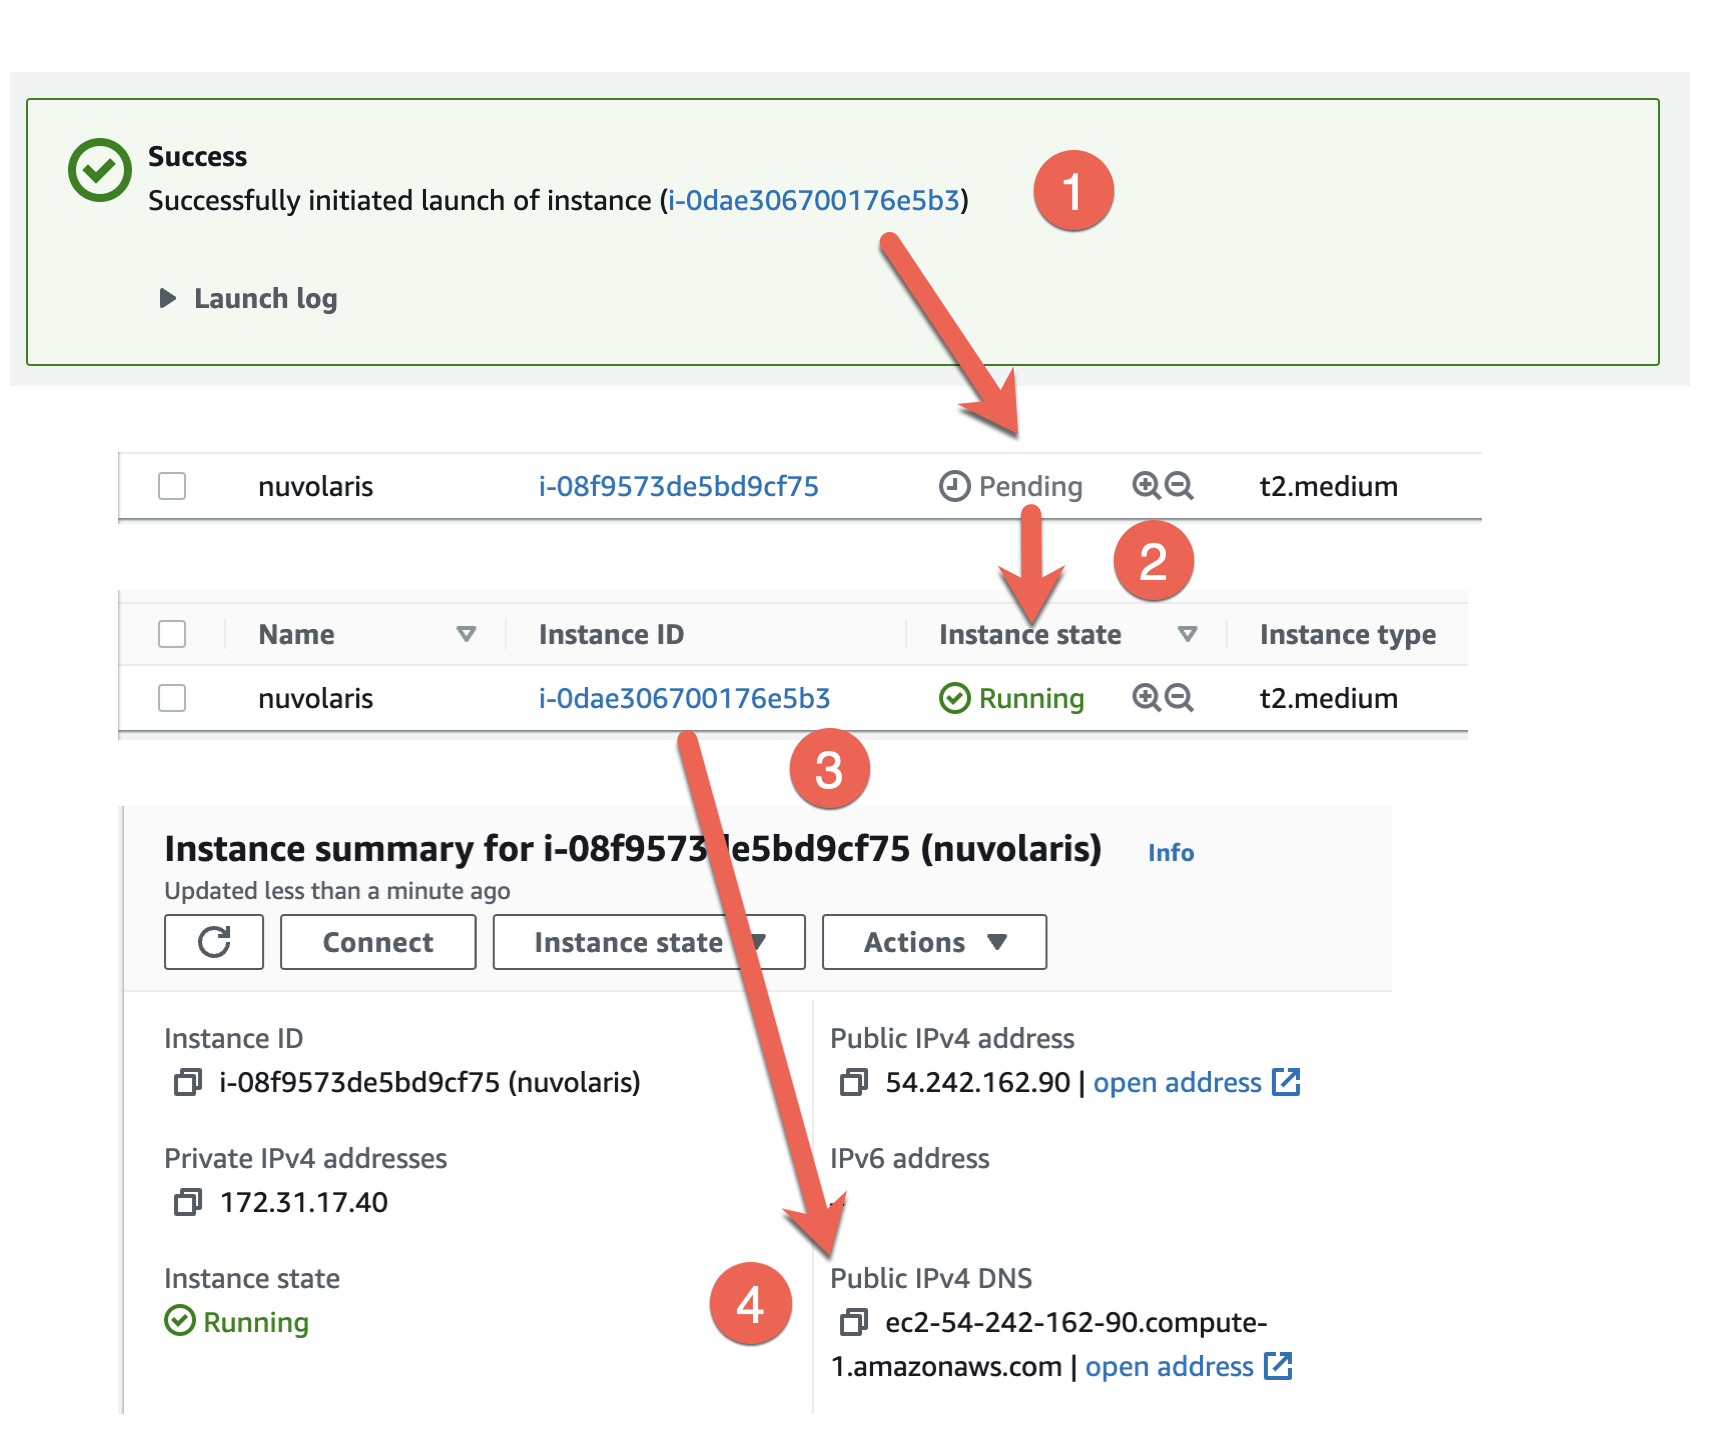
Follow the link, open the instance details, find out the `
Now you can access the instance using an SSH client. You need to use the <key-file> corresponding to the selected Key Pair name in step 8.
You can access the virtual machine with:
ssh -i <key-file> ubuntu@<public-ipv4-dns>
Install Nuvolaris
Once you are connected to the virtual machine with ssh, you can install Nuvolaris executing:
curl -s https://www.nuvolaris.io/scripts/ubuntu-ec2.sh | sudo bash
The script will take a while to install Kubernetes and Nuvolaris.
If something goes wrong, please check the troubleshooting page.
At the end it will show a command like this:
nuv wskprops --apihost=<apihost> --auth=<auth>
where <apihost> is the DNS name of your virtual machine and <auth> is the authorization key.
Take note of this command. You will need it to configure access to your serverless environemnt from anywhere using this command.
You can then install the nuv command in your favorite client machine, downloading the correct version and use the command before to connect to your instance.
Once the installation is completed, proceed reading Apache OpenWhisk documentation, remembering to use nuv wsk when you see wsk.